


What Does a Real Leak Detection Report Look Like?
You've just had a plumber carry out a leak search. At the end of the intervention, they hand you a document. This is called a leak detection report.
Most people don't know exactly what to expect. They receive the document, send it to their insurer — and hope that's enough.
It isn't always enough. An incomplete, poorly structured, or vague report can slow down — or even block — your insurance claim.
Here's what a professional report must contain, section by section, and why each element matters.
The structure of a professional report
A well-written leak detection report is divided into four main parts: client information, operations carried out, technical conclusions, and photographic documentation. Some reports add a dedicated insurance summary — that's a significant plus.
1. Client information
This section seems obvious, but it's fundamental for insurance. It must include:
- The client's full name or the name of the person who commissioned the report (owner, manager, building manager)
- The exact address of the property concerned
- The precise date of the intervention
- The context: who reported the problem, what damage prompted the call
A report without a precise date or complete address may be rejected by an insurer. These details seem obvious — yet they are sometimes missing from rushed reports.
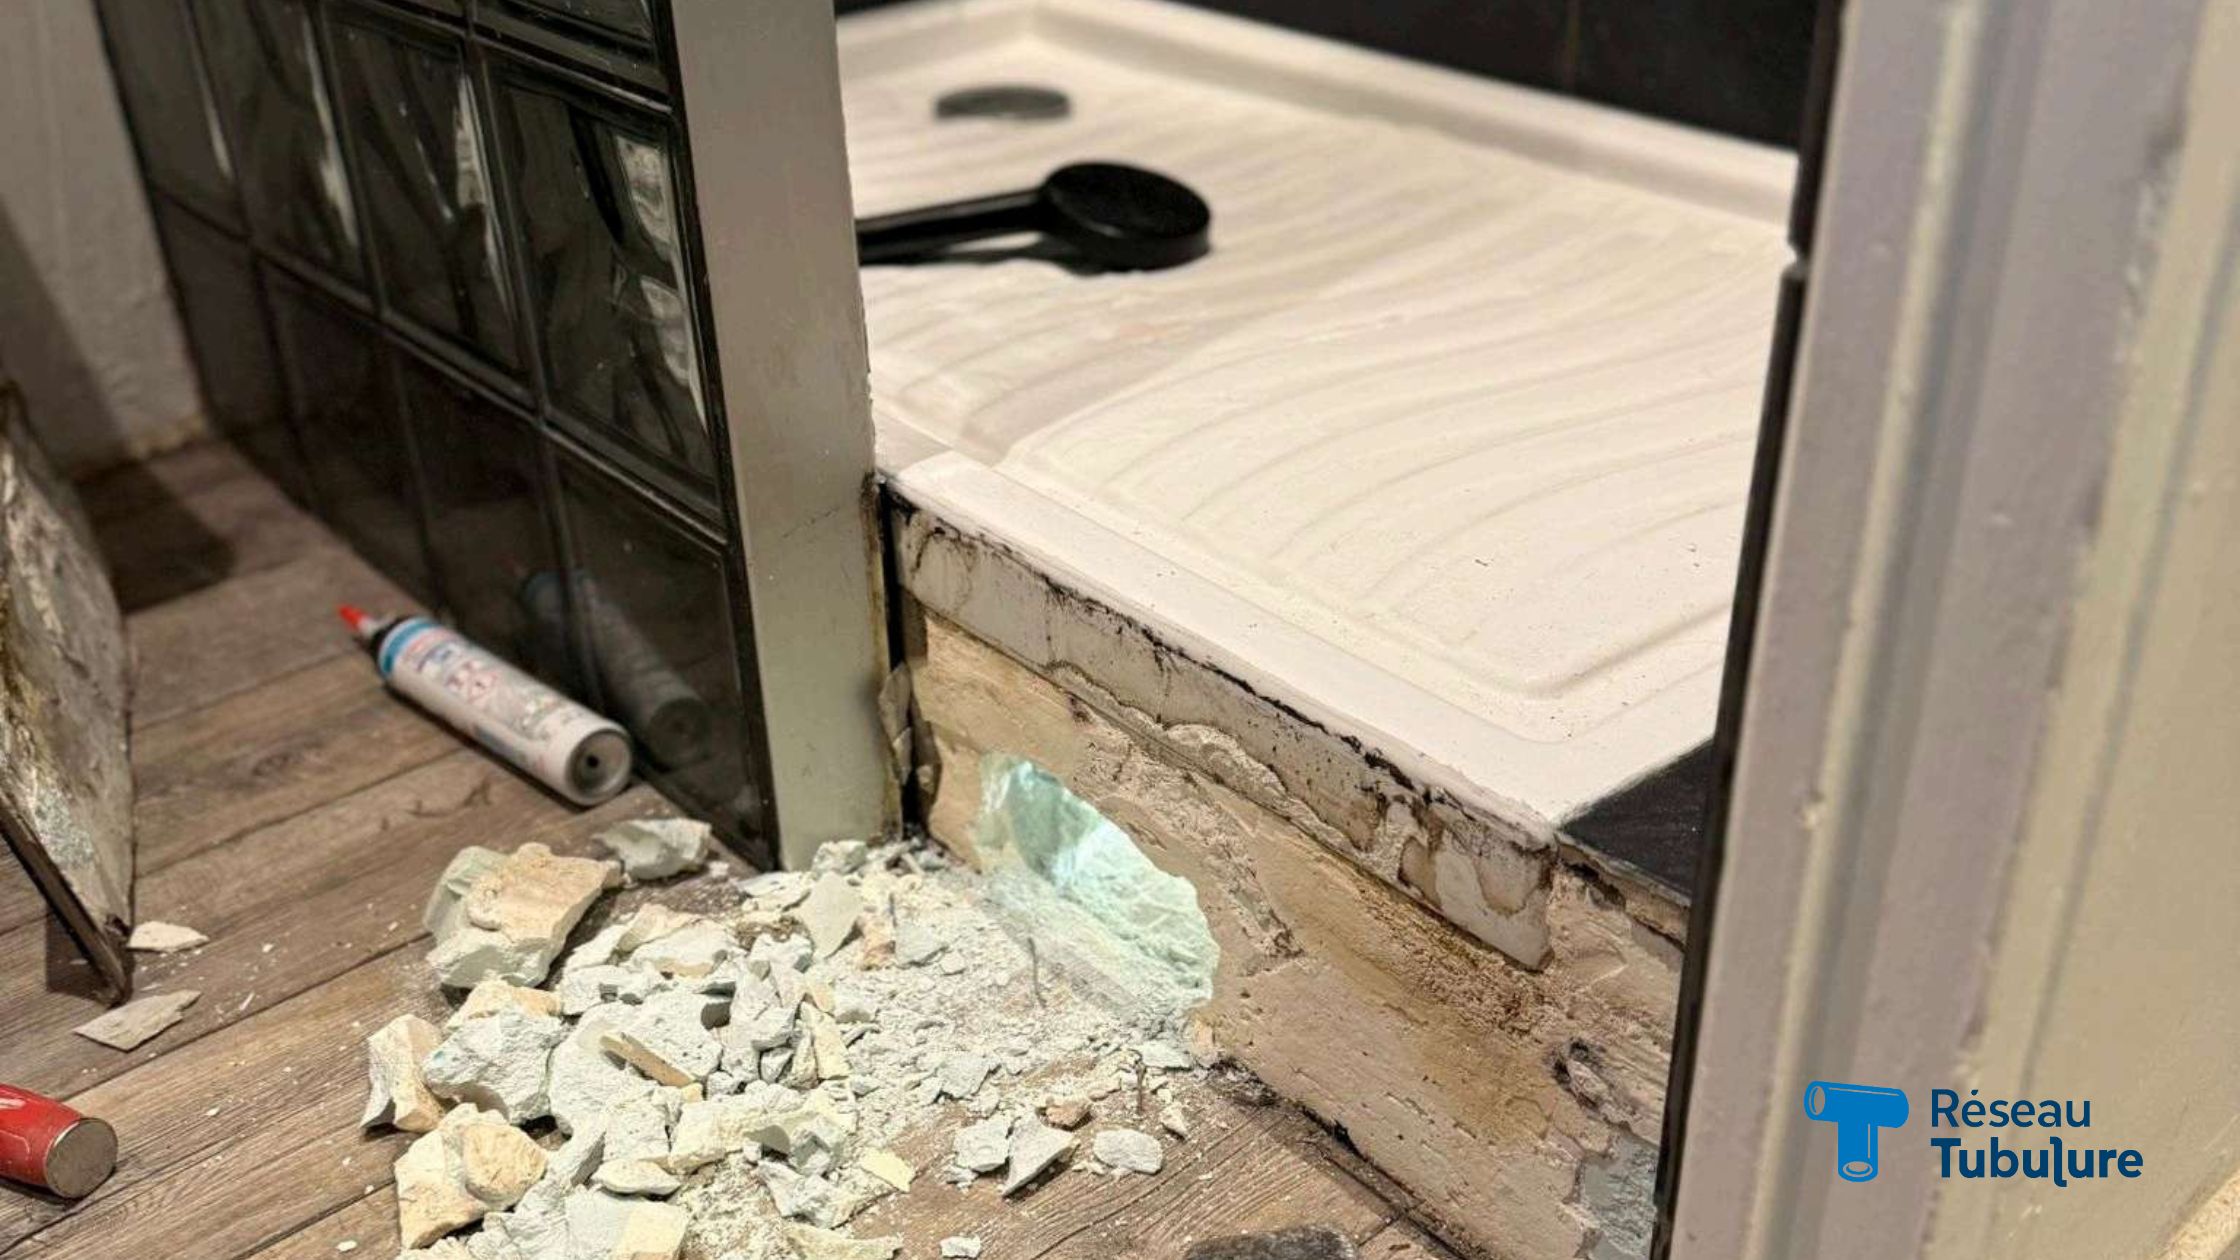
2. Operations carried out
This is the central technical section. It describes precisely what the technician did during the intervention. A good report doesn't just say 'leak search carried out'. It details the methods used, the areas inspected, and the equipment deployed.
Examples of operations that must appear in the report:
- Complete visual inspection of affected areas (entrance, bathroom, partition walls, ceilings)
- Moisture readings with an electronic hygrometer on walls, partitions and floors — with the measured values
- Use of an infrared thermal camera to identify areas of moisture concentration
- Tracer liquid test on the shower tray, toilet, and drainage
- Pressure test on the water network and pressure gauge reading to detect a pressure drop
- Targeted opening at the base of a partition wall to access materials and check their condition
The more detailed this section is, the more clearly the insurer understands that the intervention was serious, methodical, and justified. A list of 6 detailed operations is worth far more than a generic sentence.
3. Technical conclusions
This is the most important section for the insurer. It must clearly answer two questions: what is the source of the leak, and what damage has been found?
A good conclusions section includes:
- Precise identification of the leak source (shower tray, flexible hose, shared riser pipe, etc.)
- The technical evidence supporting this identification (abnormal moisture readings, tracer visible, localised thermal anomaly)
- Description of the resulting damage: degraded partition walls, oxidised metal framework, lifted floor, mould
- Recommended remediation works
A vague conclusion — 'moisture detected' — is not sufficient. The insurer needs an identified cause, a correlation between that cause and the damage, and a repair recommendation.
4. Insurance summary (when included)
The best reports add a dedicated section for insurer use. It summarises the claim in three points:
- Origin: the identified technical cause — for example 'seal failure on the peripheral joint of the shower tray'
- Cause: the nature of the claim — 'accidental and localised water infiltration'
- Damage: confirmation that the observed deterioration is consistent with and consequent to this infiltration
This section is written in the language insurers use. It speeds up file processing and reduces back-and-forth. That's a direct time saving for the client.
5. Photographic documentation
A report without photos is an incomplete report. Photos prove what the text describes. They must show:
- The visible damage areas (peeling walls, mould, damp patches)
- Hygrometer readings on affected surfaces — with the figure clearly visible on screen
- The thermal camera screen showing the localised thermal anomaly
- The result of the tracer liquid test (colour visible on the tray or at its periphery)
- Any openings made and the condition of the materials uncovered
Every photo must be captioned. An uncaptioned photo has no evidential value. A photo captioned 'Hygrometer — wall adjacent to shower — reading 63%' is directly usable by the insurer.
What separates a good report from a rushed one
Not all plumbers produce reports to the same standard. Here are the warning signs of an insufficient report:
- No hygrometer readings — just 'moisture detected'
- No photos of the detection equipment used
- One-line conclusion without precise source identification
- No insurance summary section
- Uncaptioned photos
A good report, by contrast, runs to several pages, includes measured figures, shows photos of each stage, and gives conclusions that allow the insurer to process the file without requesting further information.
Why report quality directly affects insurance coverage
An insurer cannot cover what it cannot verify. If the report doesn't prove the link between the cause and the damage, the file will be put on hold — or rejected.
Conversely, a complete, well-written report allows rapid file processing. In some cases, coverage is confirmed within days.
That's why at Réseau Tubulure, the report is an integral part of the intervention — not an afterthought. It is written with the same rigour as the technical diagnosis itself.
Key takeaways
- A leak detection report must include 5 sections: client information, operations carried out, technical conclusions, insurance summary, photographic documentation
- Hygrometer values, thermal images and tracer tests must be documented with figures and photos
- The insurance summary is the first section an insurer reads — it must be clear, precise, and in the right format
- An incomplete report can delay or block insurance coverage
- Réseau Tubulure provides a complete report at the end of every intervention